Shadowrocket Getting Started
Import a subscription, choose a mode, and make your first connection. Follow five steps to verify one working route before adjusting rules.
This page covers the steps for first-time use. For configuration fields and rule order, see Configuration Field Reference.
Add a server or subscription
Save your existing details in the app first. A successful import only confirms that an entry was added; you still need to verify that it can connect.
Open Add Server from Home
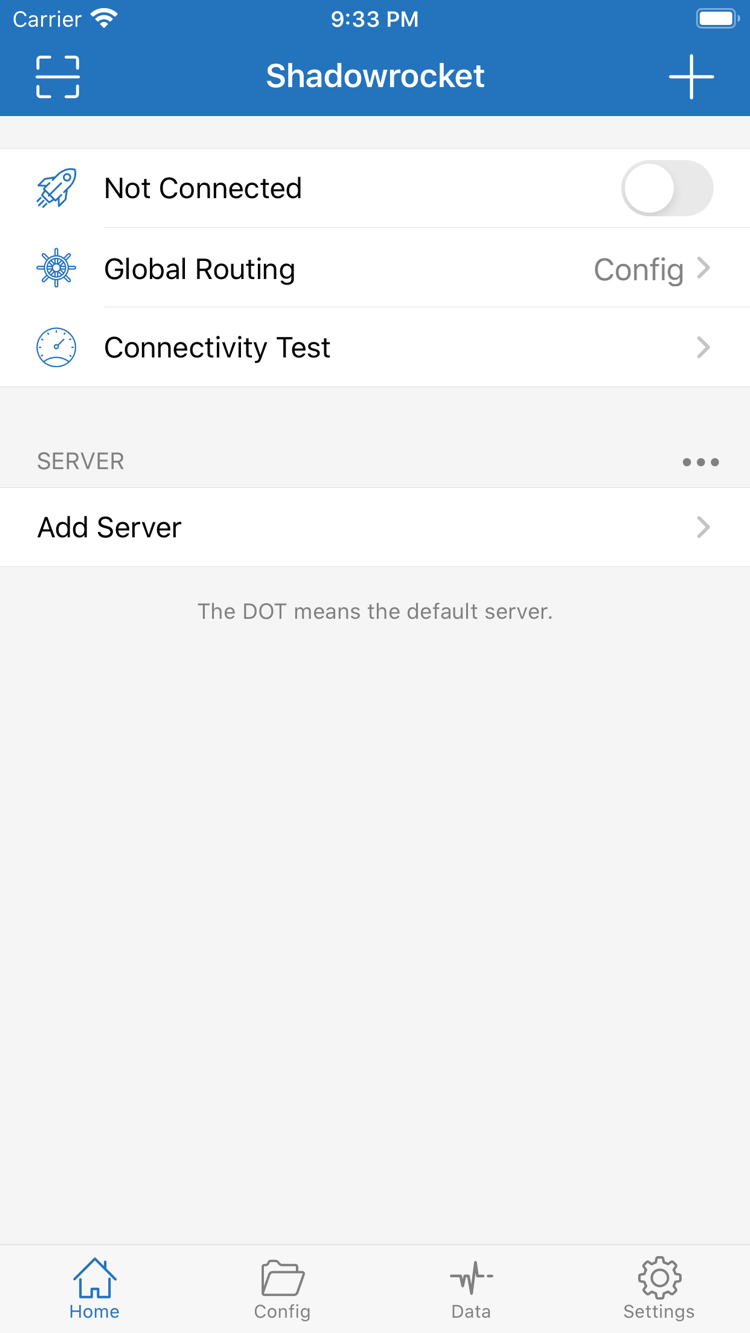
Open Shadowrocket and stay on Home. Find Add Server below the SERVER group and tap it to open the add screen. First identify whether you have a subscription link, a single server share, or connection parameters to enter manually. These are different types of information: do not put a subscription address in a server's Host field or import a single server share as a configuration file.
If the details came from your provider, read the accompanying instructions and confirm the protocol, validity, and any required additional parameters. Subscription links often contain access credentials, so copy the complete link and watch for spaces or line breaks added by a messaging app. Do not submit the link to a public page or paste it into an unfamiliar website just to check its format.
Existing subscription: use Subscribe
In Add Server, tap Type, select Subscribe, and enter your complete subscription link in the URL field. If there is a remarks field, you can enter a name that will help you identify it. Make sure the link has not been truncated, then save and wait for the app to retrieve its contents. Return to Home and check for a subscription group and its server entries. If the group appears but has no entries, do not keep toggling the connection switch. First check whether the subscription was parsed successfully.
Updating a subscription retrieves the server list from its original address; it does not extend the service's validity. If the first import fails, confirm that the device can access the internet, then check whether the link has expired or been truncated. Avoid creating multiple copies of the same subscription, which can make it harder to choose the right group. For update steps and common errors, see Subscription Updates.
Enter details manually or scan an existing QR code
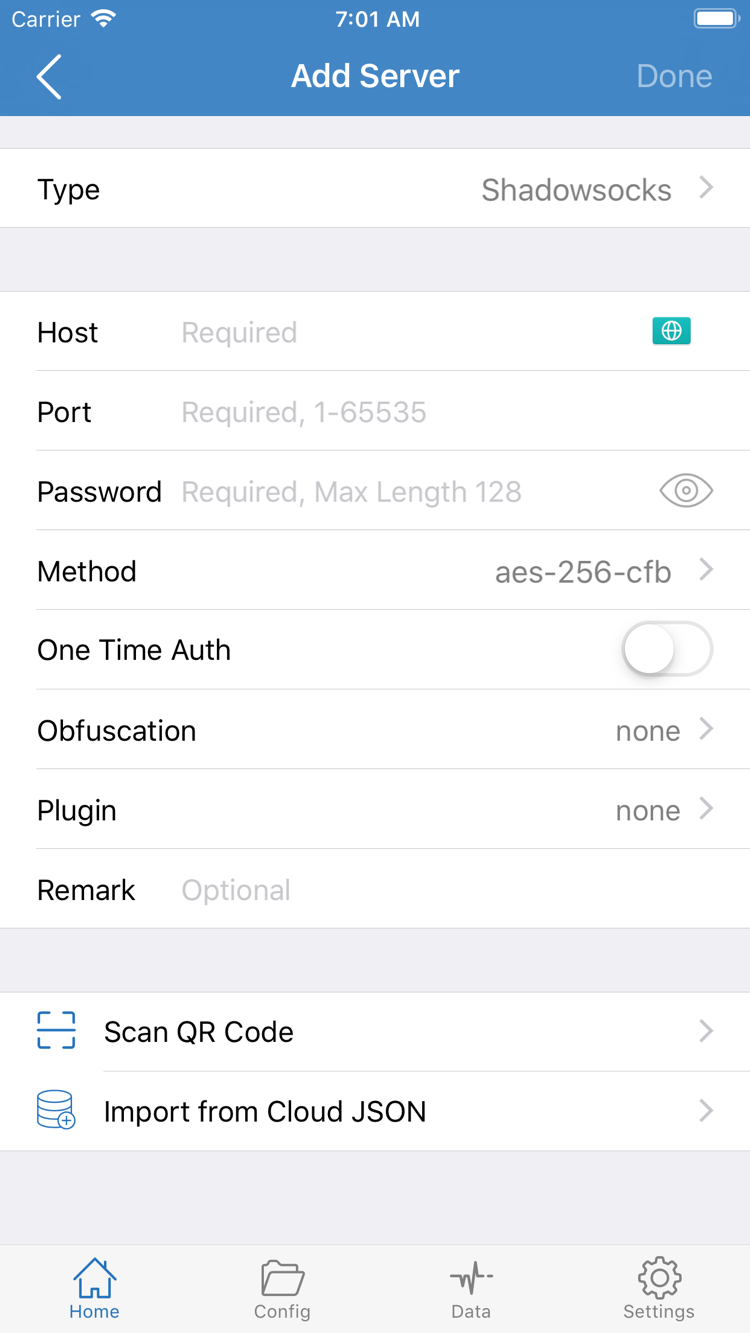
If you have server parameters, choose the matching protocol under Type, then enter Host, Port, and any fields required by that protocol, such as Password or Method. The fields vary by Type; the fields shown in a screenshot are not a universal list required by every protocol. Do not guess the protocol from the server name or change the port, encryption method, or transport parameters without a reason.
If you have a QR code, use Scan QR Code and allow camera access when prompted by the system. Check the detected type and address before saving. Import from Cloud JSON is a separate import option; use it only when your information specifically calls for that format. Do not try entering an ordinary subscription address in every available option. After saving, return to Home, select the entry to use under SERVER, and continue to the next step.
Choose Global Routing
The server determines which entry handles the proxy connection. Global Routing determines how requests are processed. Check them separately.
Understand the three common modes
Return to Home, tap Global Routing, and identify Config, Proxy, and Direct. Config routes traffic according to the active configuration's rules. Proxy sends requests through the proxy route, which is useful for an initial check of the selected server. Direct connects directly and does not confirm that the proxy exit is working. Switching modes will not fix an incorrect server password or automatically complete a configuration file.
For your first setup, if you already have a configuration file for your needs, select Config and check which configuration is active. If you only want to check whether the server works, you can briefly select Proxy and compare access, then switch back to the mode you normally need. Do not change both the server and rules without knowing the current mode; even if access returns, it will be difficult to tell which change made the difference.
Check the active configuration in Config
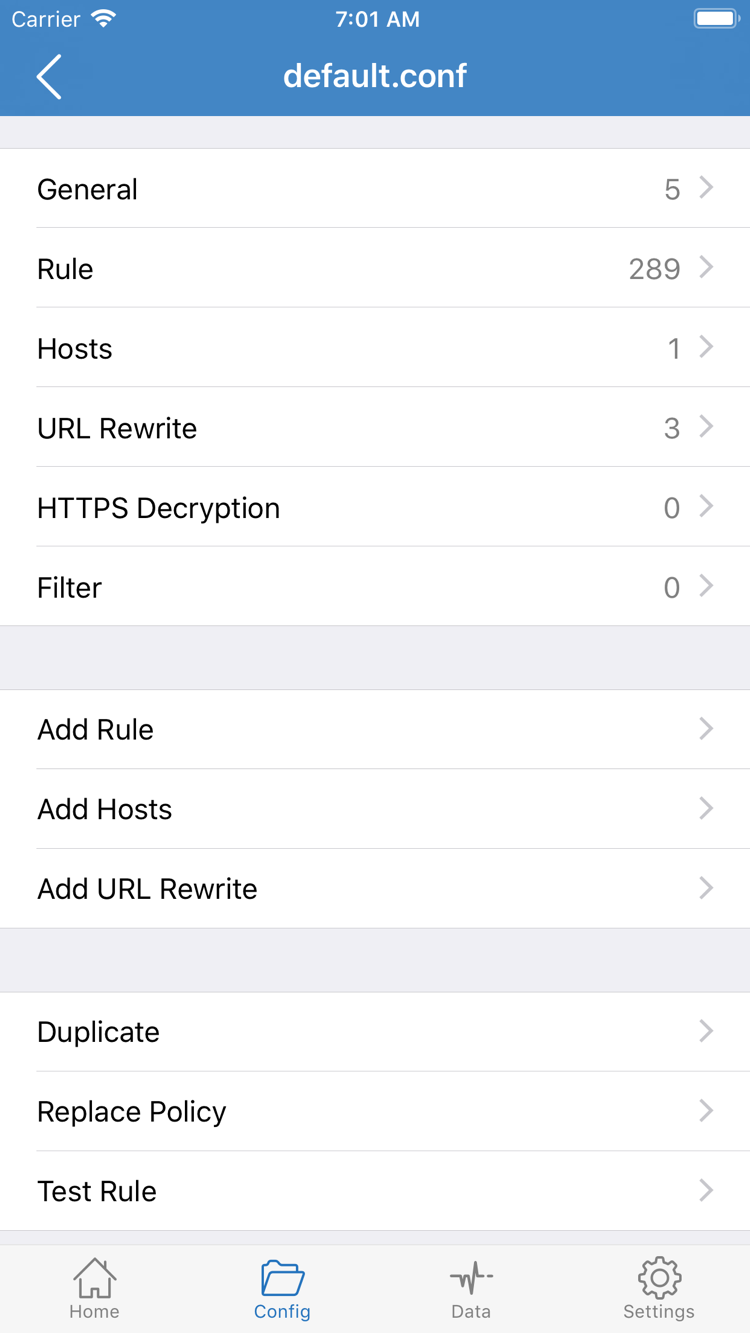
Open Config, find the configuration file you plan to use, confirm that it is selected, and review its Rule. The official screenshot shows sections in the configuration editor, including General, Rule, Hosts, URL Rewrite, and HTTPS Decryption. Each serves a different purpose. You do not need to change each one to connect for the first time, and you do not need to enable HTTPS Decryption for this guide. A configuration file and a server subscription are different kinds of information; importing a subscription does not mean your rules are already configured.
The Rule snippet below is only an example to explain the syntax: requests to example.com and its subdomains use PROXY, and the remaining requests go to DIRECT as specified by FINAL. It is not a complete configuration file or a default rule for every network. Rules are generally checked in list order, so an earlier match can affect the result. FINAL is typically used as a fallback at the end. Before adding a rule with Add Rule, understand the scope of the selected type.
DOMAIN-SUFFIX,example.com,PROXY
FINAL,DIRECT
Keep a copy of the original configuration that works before making changes. If you are unsure what DOMAIN-SUFFIX, IP-CIDR, or a policy name means, read the Rules and Configuration Reference first. The next steps cover connecting and testing; you do not need to write a full set of routing rules now.
Turn on the connection
After choosing an entry and mode, handle the system permissions. Check the connection switch and actual access separately.
Check SERVER and the switch at the top
Return to Home and confirm that the selected entry under SERVER is the subscription or server you just added. If the subscription contains multiple entries, choose one known to work and avoid switching repeatedly while connecting. Check Global Routing again and make sure the mode selected in the previous step is still active. The screenshot shows Not Connected at the top as an example of a disconnected state, not an import error.
Tap the connection switch at the top. The first time you connect, the system may prompt you to authorize adding a VPN configuration. Read the prompt, choose Allow, and confirm with your device passcode or biometric authentication as required. This permission lets Shadowrocket create a system connection configuration; it does not import a subscription again or purchase server service. Once authorized, return to Home, wait for the status to change, and continue to the test.
If it will not connect, check permissions first
If you declined the prompt, return to the app and try connecting again, then follow the system prompt to authorize it. If the switch immediately turns off again, first check whether the VPN configuration is still present in system settings and whether another active VPN connection is causing a conflict. Do not repeatedly remove all system network settings. Note the exact prompt and refer to Frequently Asked Questions for the appropriate next step.
A change in connection status means the system connection process has started, but it does not guarantee that the server, DNS resolution, and routing rules are all working. The VPN indicator in the status bar is not a substitute for testing a webpage. Keep the server, mode, and configuration unchanged and move on to the verification steps so you have a consistent basis for comparison if anything goes wrong.
Verify the connection and rules
Check test results, real-world access, and rule matches separately. Do not treat a single status indicator as the whole picture.
Run a test, then visit a real webpage
Tap Connectivity Test on Home and wait for it to finish. The test method affects the result: no response from one test does not necessarily mean that every app is unable to connect, and a displayed test result does not mean every domain will match the expected rule. Note the result, but do not immediately delete multiple servers based on it. To check the test method, find Test Method in Settings and try to keep it unchanged during your first verification.
Next, open a browser and visit a website that you know normally works to confirm that the device still has basic network access. Then visit a webpage that should use the proxy under your current configuration and wait for it to load, rather than relying on content left in an old tab. Reload the page or open a new tab if needed to reduce the effect of caching. If you are using Direct, a page loading successfully does not prove that the proxy route works; consider the current mode when interpreting the result.
Compare by changing one thing at a time
If Proxy works but Config does not, keep the same server and check the active configuration's rules, DNS settings, and final policy. If neither mode works, first recheck the server details and availability instead of adding more rules. When checking a target request in the app's connection records or Data, confirm that the target domain, matched rule, and policy are what you expect. If there is no record, do not assume that the request went through the proxy.
Verification is complete when the intended entry remains selected, the connection status is stable, the webpage loads, and requests that require routing use the expected policy. After these checks, switch back to your usual Config and test once more. If you want to use On Demand, configure the applicable network conditions separately. It triggers connections based on conditions; it is not a fix for an unavailable server.
Troubleshoot common failures
Change one condition at a time. Check your details and server first, then permissions, mode, DNS, and rules.
Subscription is empty or server is unavailable
If no servers appear after import, return to the subscription editor and check that the link is complete, the format is correct, and there are no update errors. An expired subscription, a response that does not contain a server list, or a device that cannot access the subscription address can all cause an import to fail. If the list is present but an entry cannot connect, check Type, Host, Port, and authentication details. If needed, ask your provider to confirm that the entry is valid. Updating a list and connecting to a server are separate tasks; one does not guarantee the other.
Switch will not turn on or there is no access after connecting
If the switch will not turn on, first check the system VPN permission and any app prompts. If the switch is on but webpages will not load, keep the current server selected, make sure Global Routing is not set to Direct when that is not what you expect, then compare Proxy and Config one at a time. If ordinary webpages also fail when Shadowrocket is disconnected, first troubleshoot Wi-Fi, mobile data, or the system network rather than changing app parameters.
Only some domains or apps fail
For a partial failure, note the specific domain, the network conditions, and whether the problem occurs only in Config. Check DNS and Rule in the active configuration, but do not change every DNS entry to the same address just because a page will not load. DNS resolution and the connection itself can both fail, so use diagnostic information to distinguish them. If the problem started after adding a rule, revert that change and test the same destination again. Also check whether FINAL sends unmatched requests to the intended policy.
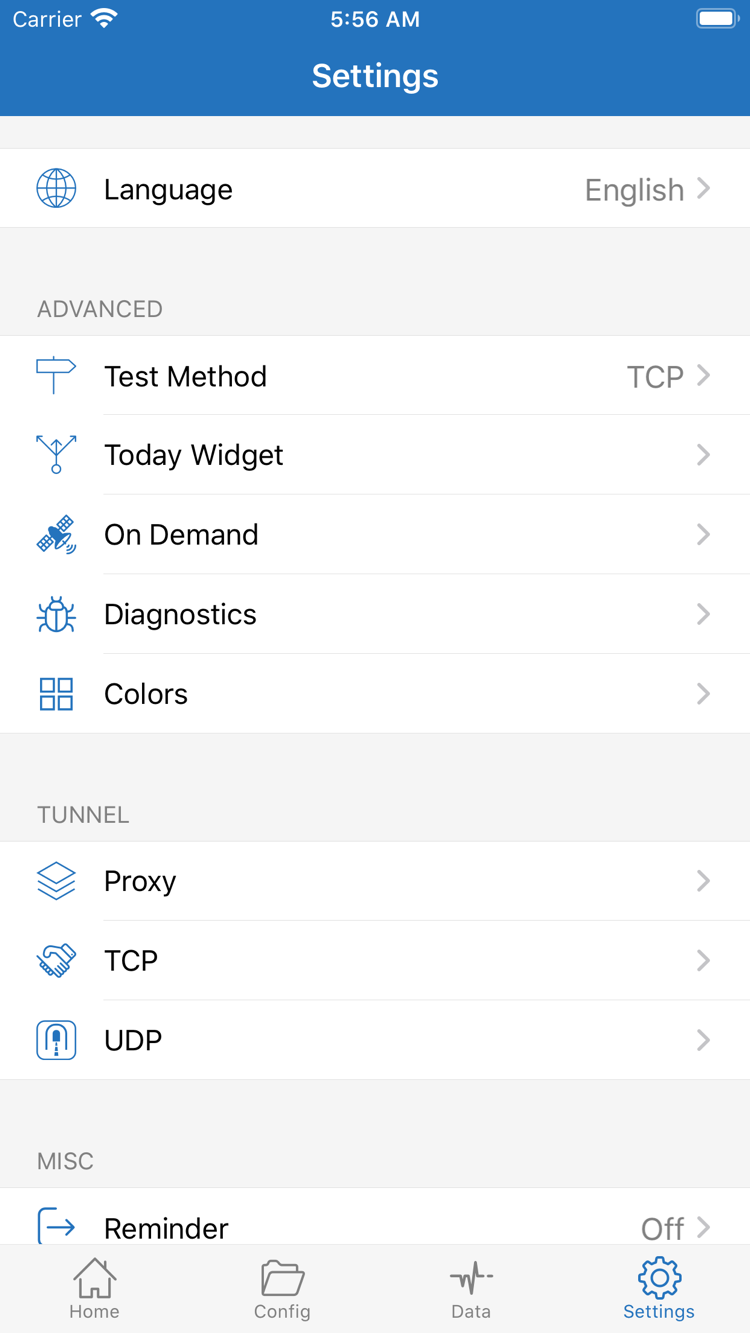
Settings includes Diagnostics and related options such as Proxy, TCP, and UDP. When troubleshooting for the first time, review the available diagnostic information before changing advanced options. Protocols and destination apps can have different transport requirements, and switching settings without a reason can introduce new variables. Configure On Demand after you have verified a manual connection to avoid automatic reconnections affecting your test.
Keep useful details and hide credentials
If you need to investigate further, note the device's network type, current Global Routing mode, failed destination, and error message. Specify whether the issue occurred during import, authorization, or actual access. Hide subscription links, server authentication fields, and personal information before sharing screenshots or logs. For a complete checklist, see Connected but No Internet. For account, permission, and common import issues, see Frequently Asked Questions. You do not need to change every advanced setting in this guide.